Painting a Whimsical Table
- Melissa Geskie
- Mar 15, 2021
- 5 min read

Have you ever let your imagination run wild with color? In a world of white furniture it can be super refreshing to let go, be bold, and let whimsy take over for a bit.
I'm quite active on Instagram and have a large following. By using the hashtag #RVA (Richmond Virginia Area) I've been able to meet and connect with local people and build a great local following. I had a local follower ask if I could design a table for her. I'm sometimes hesitant to agree to custom work with such a full schedule and the possibility that the client want something run-of-the-mill. Think simple white. And, plain white makes me bored.
Thankfully, this wasn't the case for this gal! She sent me a couple of photos of a table designed by Mackenzie's Child - a crazy talented designer that paints bold wonderful color. Kind of like my friend Tracey from Tracey's Fancy! Tracey was one of the first artists online that caught my eye, she is a bold and colorful artist who takes chances with color that amaze me. The table my client wanted painted was quite small and the fact that she wanted me to go bold and "do all the things!" made me over the moon with excitement.
How did I decide to come up with this crazy color scheme? I knew that black and white would play heavy into this design. She wanted napkin decoupage in the form of butterflies, as she'd seen me use before. Since the butterflies are bold bright color, I chose the tones from the wings in a more muted color pattern. And of course gold, I need to add gold somewhere! Let's begin.


First things first, proper prep! You will hear me say this often, I'm a broken record when it comes to it, in fact. If the proper prep work is not done then you are risking all of your hard work! I always clean every item including hardware with WHITE LIGHTNING. Rinsing well with water after cleaning, I then always scuff sand a item to give my paint something to grab onto. If my surface is very slick I will use SLICK STICK to finish the prep, and give my paint an extra grab.
Once this little table was cleaned, I removed the farmhouse style hardware and filled the holes with MUD. Dixie Belle's MUD is a filler that allows you sand back to flat and make those holes disappear!
When my MUD has dried I sanded back the excess to flat. Easy peasy! The holes are gone and I have a smooth area for painting.
Since the goal was to make this table bold, using multiple colors, I wanted to start with a white base. I chose WHITECAP SILK PAINT for the job. Dixie Belle's Silk All-In-One paint has a built in primer and topcoat that will prevent bleed through on my project. Using a dry SYNTHETIC BRUSH I painted two even coats of WHITECAP for the base. Waiting two hours between coats for the paint to cure. This white will also be the base for checks and diamond painting.
Products Used
Belles & Whistles Decoupage Paper (Blue Sketched Flowers)
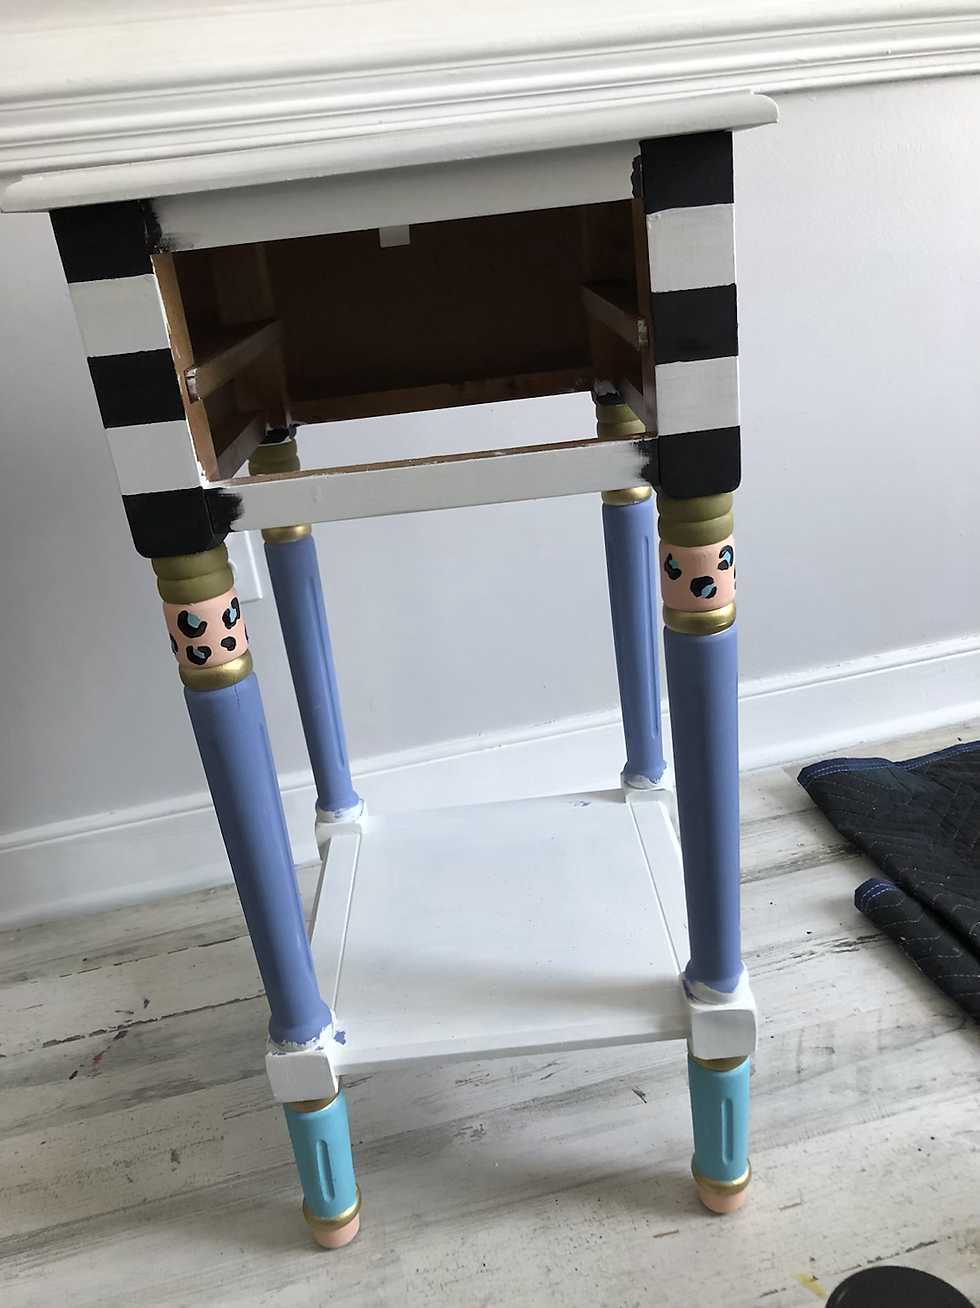
Starting with the drawer, I added two coats of HOLY GUACAMOLE, and set it aside to dry. This will be the base for a fun stencil later. See all the little groves on the legs? These are the prefect base for multiple colors. I like to separate the colors with gold so they don't all blend together. I started with APRICOT on the legs, moving onto BLUEBERRY. On the feet I added some DIXIE BELLE BLUE. Remember my hint about ensuring colors don't blend together, put pop? Enter GEMSTONE MOUSSE in GOLDEN GEM, which created a barrier between the color blocks. I added CAVIAR to taped off areas on the side to start the checkered pattern. Each color will take more than one coat. Build your paint up to the thickness you like. Checks and diamonds are easy to do when you use painters tape to create a base.
Some of the areas needed a little more jazzing up. I added some handprinted cheetah print to the APRICOT areas. I used DIXIE BELLE BLUE to make random dots, all in different sizes and shapes. I then used CAVIAR to create the cheetah look on top of them. Remember: keep the dots different and random in size to make it look authentic.
It was time to add more whimsy. I started with a flower print. I used BLUE SKETCHED FLOWERS decoupage rice paper from the Belles & Whistles line. Rice paper is easy to use and apply. I measure out the area and score it with my finger. Then, I cut the paper to size and apply with SATIN CLEAR COAT. Since the rice paper has a heavier weight it doesn't rip or tear when your putting it down, making decoupage easy and simple!
I taped off the area on the drawer that I wanted to keep HOLY GUACAMOLE and added a Silkscreen Stencil (PATTERNS) from the Belles & Whistles line. First, I laid down the stencil, sticky side down, and used a foam applicator to apply GOLD DIGGER from the MOONSHINE METALLICS line. These stencils are reusable, so be sure to wash in warm soapy water after use. I also painted PLUM CRAZY around the area where the drawer slides in.
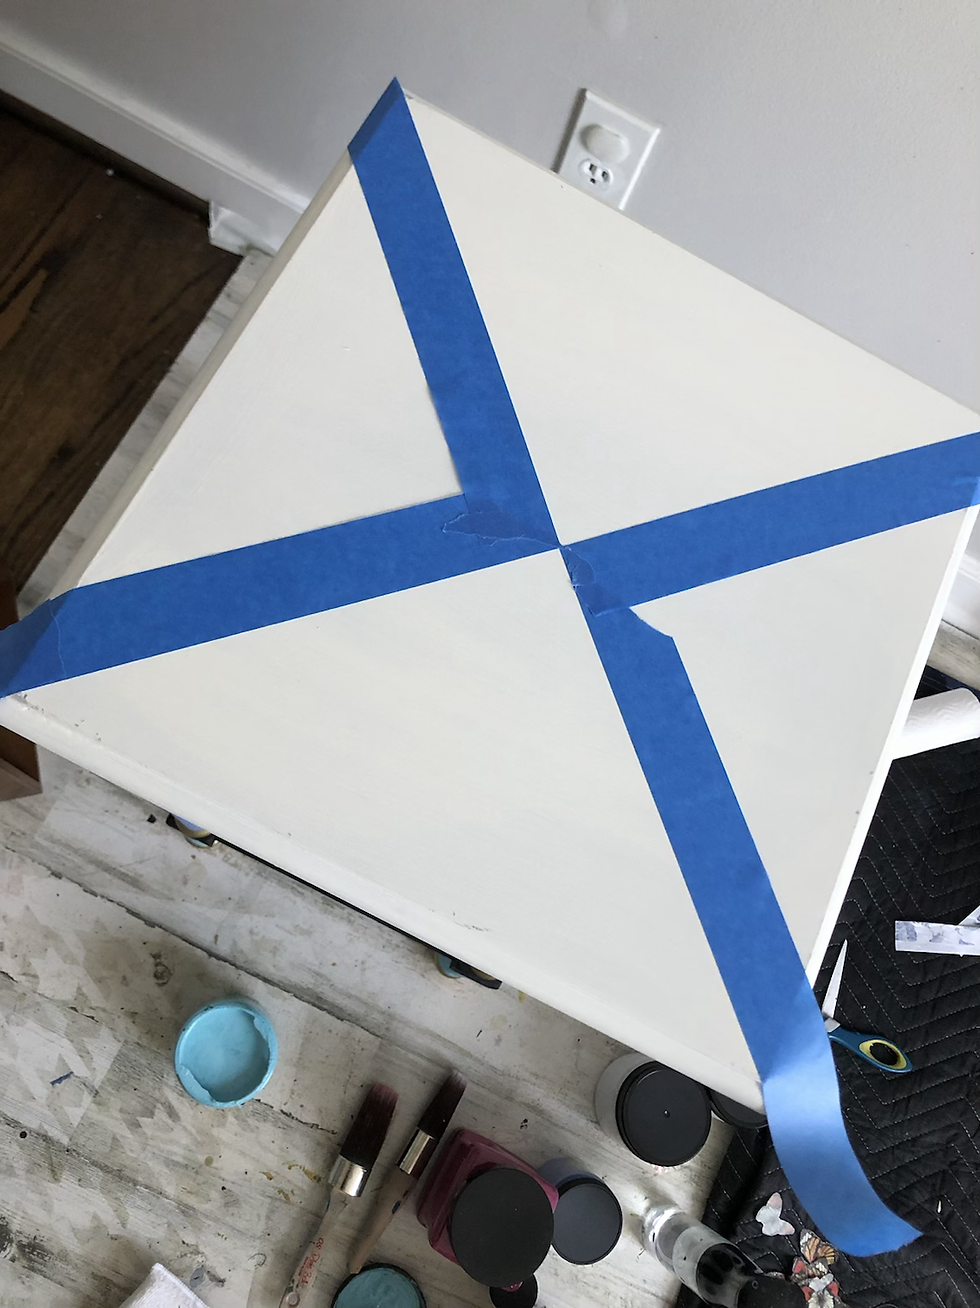
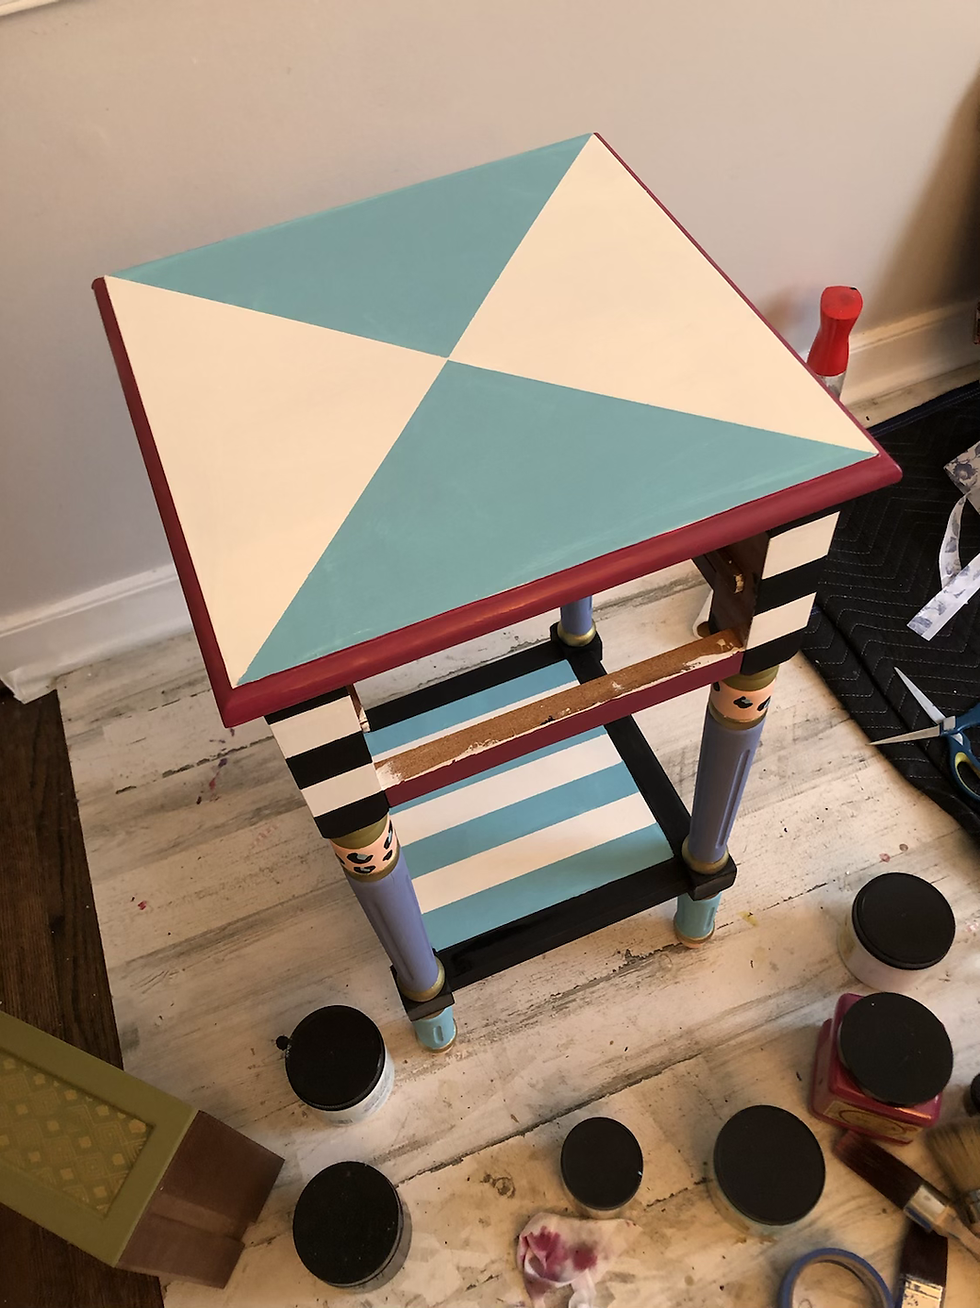
I taped off the diamonds on the top and stripes on the base to get ready for the accent color. For this I chose DIXIE BELLE BLUE. I painted on the stripes and when fully dry, I removed the tape. Final details included adding CAVIAR onto the base edges and PLUM CRAZY onto the top rim as well.
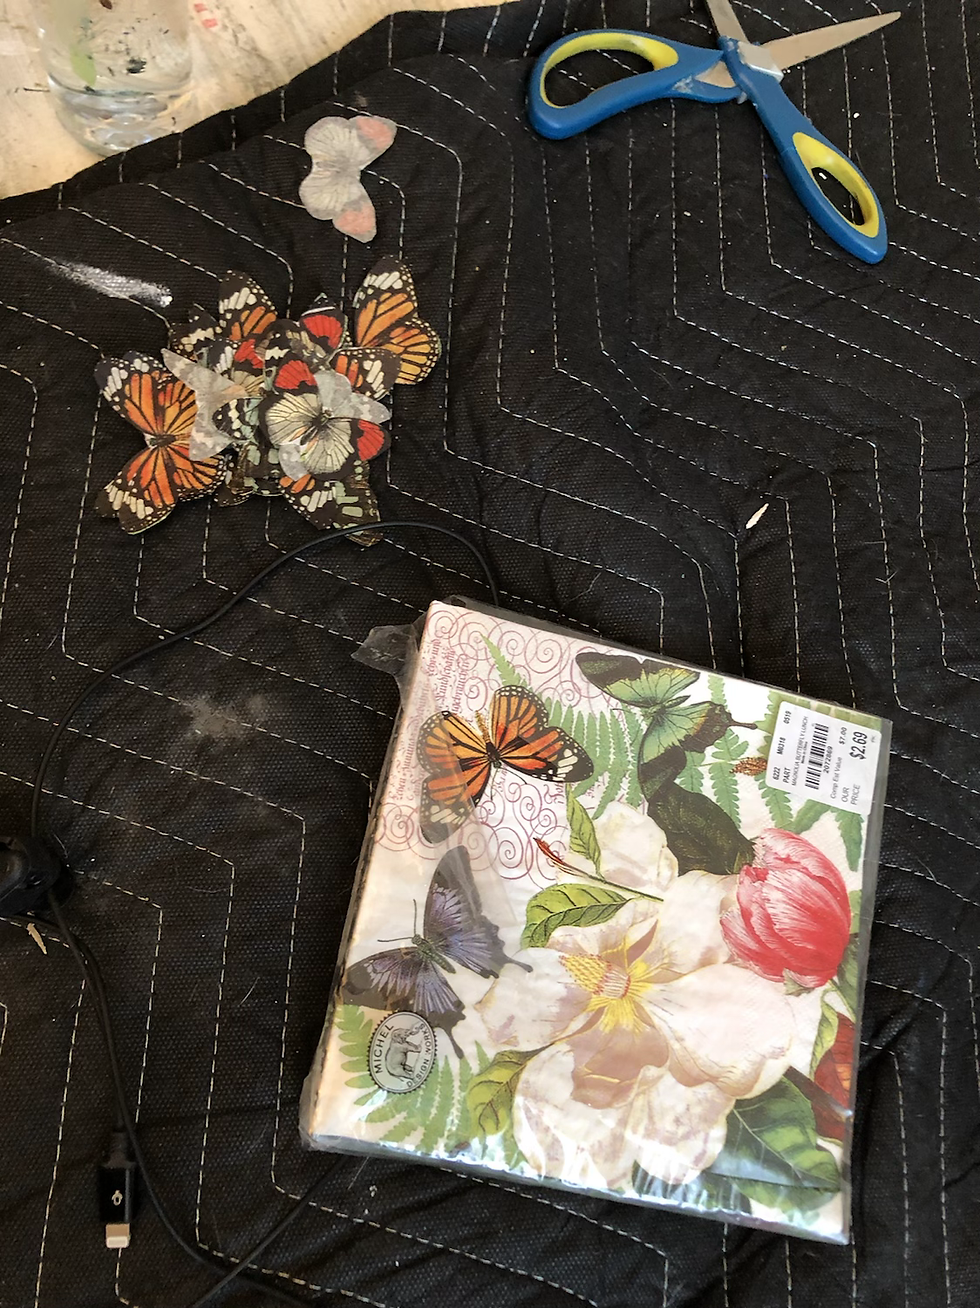
The client had seen a previous piece that I adorned with napkin decoupage and wanted a similar look. Napkin decoupage is easy to do. First, find a napkin with a print you like. (I often shop discount stores and look for images that can be cut up and layered.) Then, separate the layers of tissue, usually there are three. When you are down to the thinnest sheet with the pattern on it you can cut out what you want to use. It's helpful to use sharp scissors. I cut as many butterflies as I could out of two napkins. I applied the butterflies with a small artist brush and SATIN CLEAR COAT, brushing the clear coat directly onto the napkin.
You still with me? Good! We're almost done!
Let's add the final touches to the piece with GILDING WAX and BEST DANG WAX in black. I like to soften the edges with the waxes to give them shine and some depth. I also sealed the entire table in SATIN CLEAR COAT to protect my work.
I sat back and looked at the tiny table, deciding it still needed more. I added the tiny dots onto the area above and below the drawer with the PATTERNS Silk Screen Stencil and some LUCKY LAVENDER.


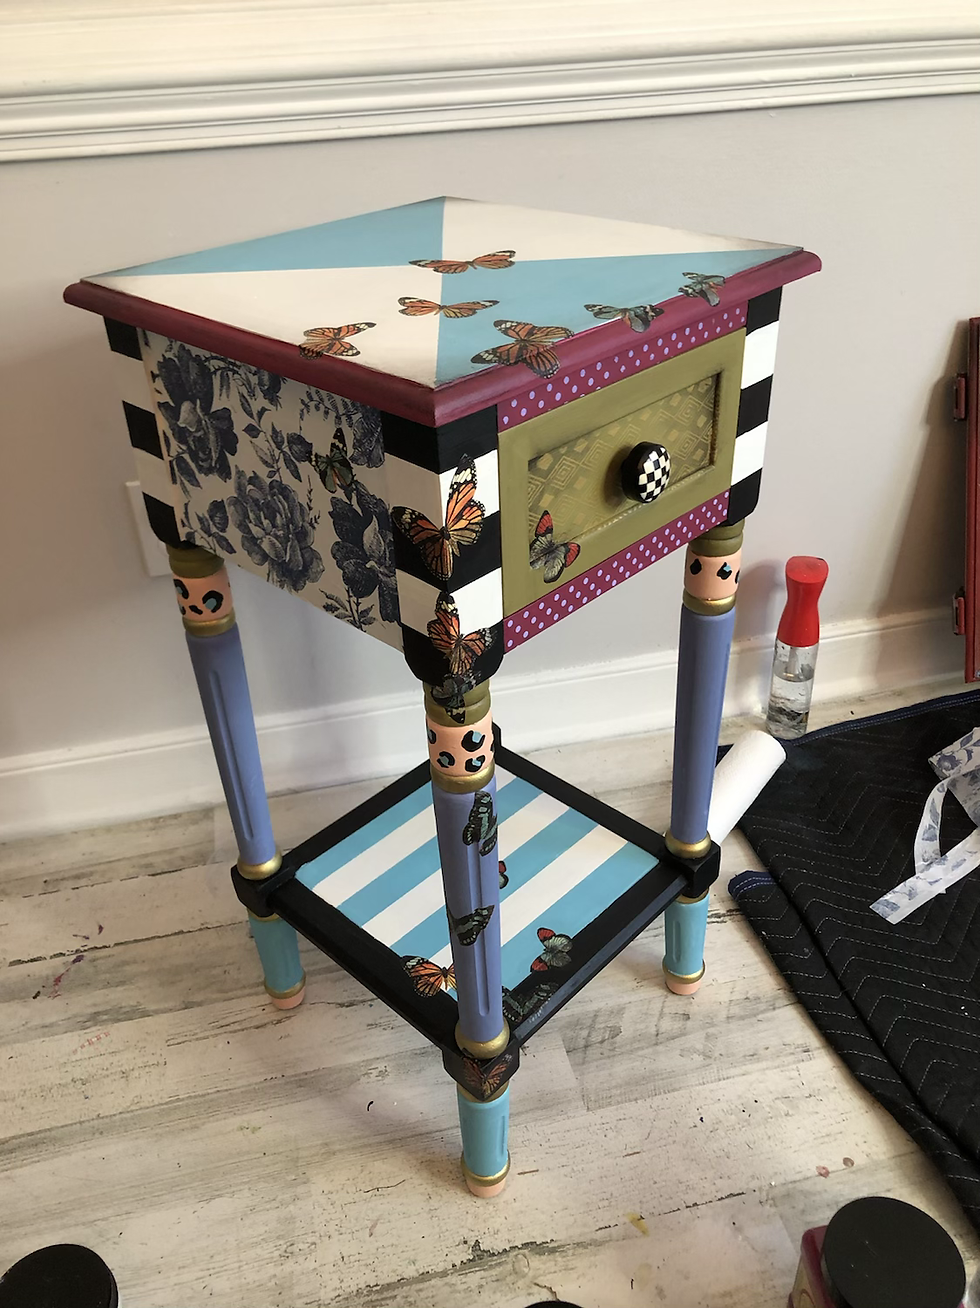
And now, I think she's all done! What a colorful, whimsical piece. Glittering butterflies, floral decoupage, and shimmering gold shining details! Multiple patterns and fun, all wrapped up onto one tiny table. I drilled a new hole for the checkered hardware I found and installed the knob.
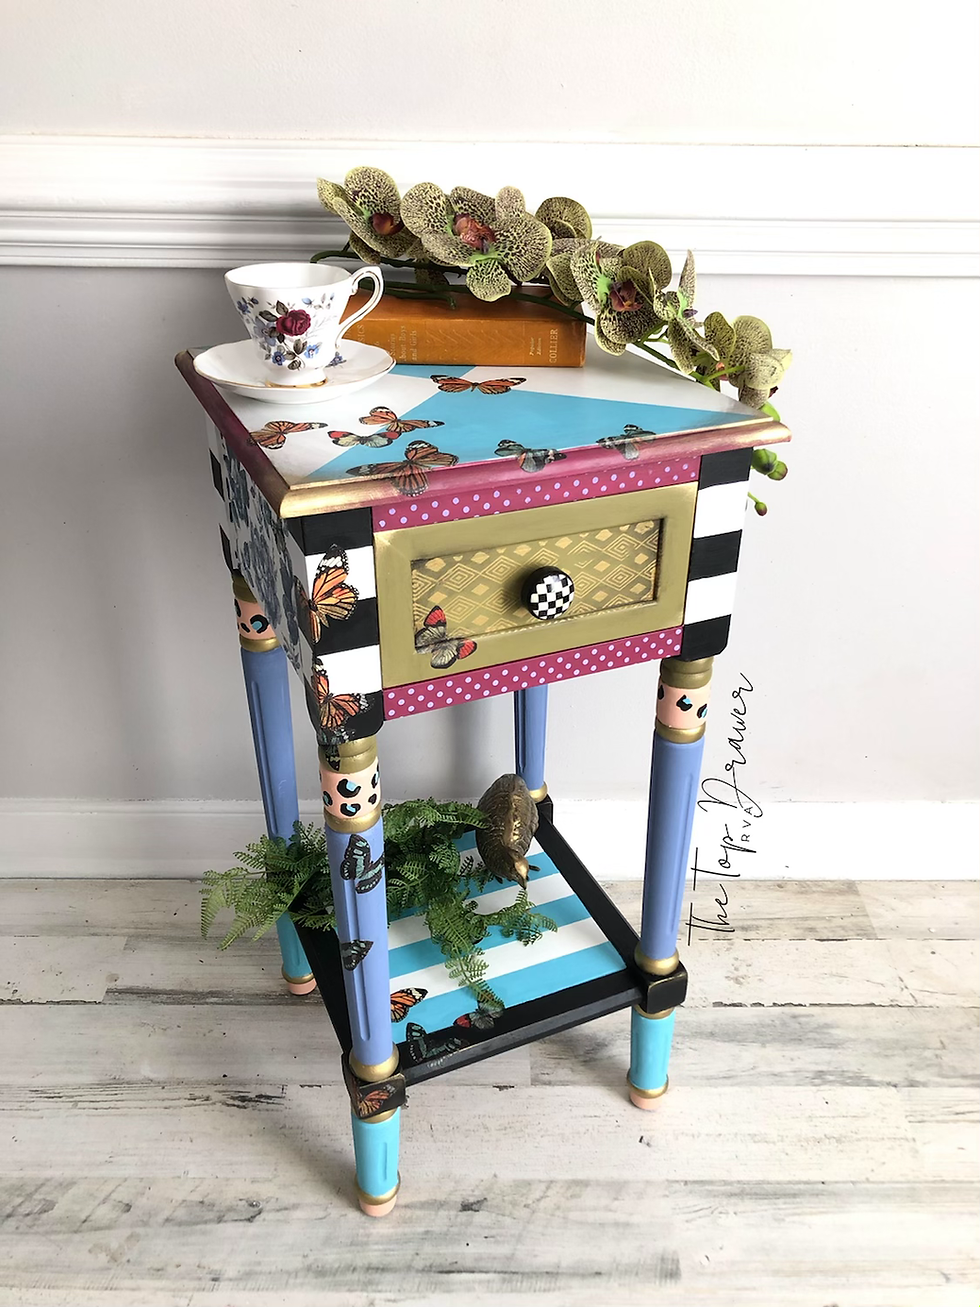
What do you think? Are you ready to take the bold step into whimsy and color? Don't be afraid to be bold and mix patterns, you might be surprised at what you create!
Belle's & Whistles Decoupage paper releases March 17, 2021 to Elite retailers! Find yours here! Make sure to sign up for my newsletter and I'll be blasting out new release items on the date they become available to the general public!
Want to watch a Tik Tok of this piece? Click here!
Melissa
Dixie Belle Brand Ambassador


***This post contains affiliate links, these are at no added cost to you but provide me with a small monetary amount if you decide to purchase any item. Thank you for supporting small businesses!


