Rust to Riches: Transforming a $2 Yard Sale Find with Patina! A Dixie Belle Paint Tutorial for Patina PRODUCTS!
- Melissa Geskie
- Jul 12, 2025
- 3 min read
Hey there, fellow crafters! Do you ever stumble upon a hidden gem at a yard sale and just know it's meant for something amazing? That's exactly what happened to me when I found this ceramic column for a mere two bucks! It had potential, just waiting for a little creative magic. It's ceramic, and will require some prep before paint. Bonding Boss to the rescue!


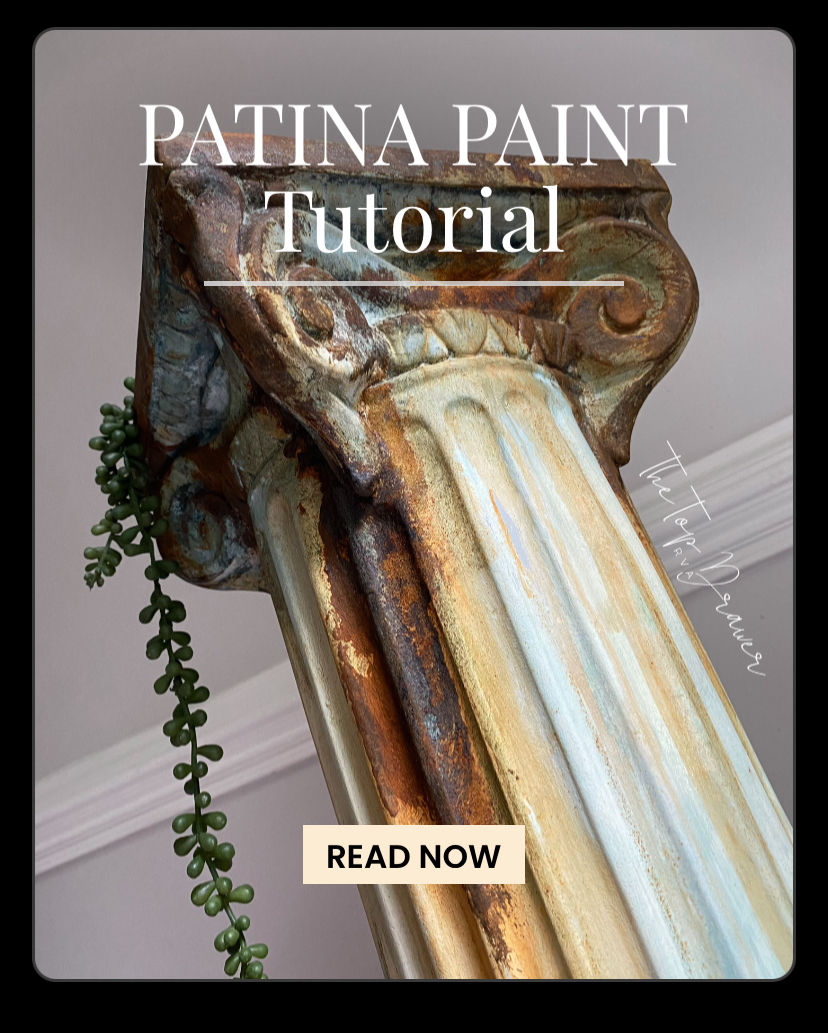
I started by giving it a fresh new look with Dixie Belle's Terra Clay Paint, aiming for a beautiful blue boho vibe. But then came the truly fun part: rusting and crusting it up with patina! This is where the real transformation happened, thanks to Dixie Belle's fantastic Patina Paint and Sprays.
Want to watch the whole video including the Terra Paint being applied? CLICK HERE!
Getting That Perfect Patina: Iron and Copper Magic!

Dixie Belle's Patina line is seriously addictive. It contains real metal particles that react with the Patina Spray to create an authentic, aged look. For my column, I used the Iron Patina Paint and Copper Patina Paint along with the Blue Patina Spray. Now, let's get to the nitty-gritty of how to achieve this stunning effect:


What you'll need:
Your prepped and painted piece (mine was my blue boho column!)
White Lightning to clean well
Bonding Boss for prep
Dixie Belle Patina Paint (Iron and Copper for this project)
Dixie Belle Patina Spray (Blue)
Brushes for applying paint


Instructions:
Prep your piece: Make sure your item is clean and has a base coat of Dixie Belle Paint, like my blue Terra clay paint.
First Coat of Patina Paint: Apply one coat of your chosen Patina Paint (I started with Iron, then added some Copper) and let it dry completely. Remember to shake and stir the Patina Paint very well before use, as the metal flakes can settle at the bottom.
Second Coat & Spray Time! Apply a second coat of Patina Paint. While this second coat is still WET, immediately apply your Patina Spray. For my project, I used the Blue Patina Spray. This is where the magic happens! The spray reacts with the metal in the paint, initiating the patina process.
Watch the Transformation: The full effect of the patina will develop over 2-6 hours as it dries. You'll see the gorgeous rust and crust form right before your eyes!
Seal (Optional): No sealing is necessary for the patina, but you can use Patina Guard if you wish.
The result? A stately design that's perfect for any home, with a unique, aged look that tells a story. My $2 yard sale find is now a sophisticated, one-of-a-kind piece that looks like it cost a fortune!
Did you know Dixie Belle has a PATINA STARTER KIT? Perfect to try it out!


Need a video tutorial? Click here to watch exactly how each color turns out!

I'll also drop in some other patina paint projects here! They are all so cool!


Thanks for hanging out for my painting journey! Stay tuned for more, and thank you for supporting small!
Melissa
The Top Drawer RVA *****This post contains affiliate links. No added cost to you but allows me to earn a income for the free tutorials I provide!


