How To Use Transfers & Paint to Transform a End Table - Simple Photo Tutorial
- Melissa Geskie
- Dec 16, 2019
- 3 min read

Before the paint transformation! Boring and brown. I need color!

I picked up this beauty at a auction recently and knew with those scroll details it could be a show stopper! It was in great shape and a really good size, it just needed a update.
After cleaning with White Lightning and giving it a slight sand scuff (this is to help give the paint something to adhere to) I was ready to begin.
I recently have started to use transfers on my furniture and just purchased this one called Lavender Fields by Redesign by Prima. It can be purchased here.

I planned the entire piece around the color in this transfer. Its a easy way to design furniture and pick your colors, start with one thing and choose all the colors from there.
Colors Used
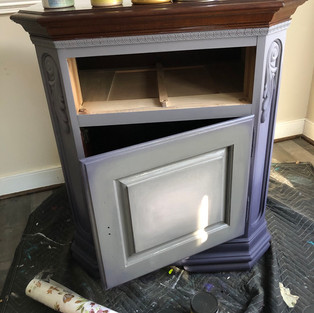
To begin I used Aubergine at the base of the cabinet, and moved up into Mason Dixon Grey. I painted two coats of each color and on the second coat I used my spray misting bottle filled with water to help blend the colors together. Keeping separate brushes for each color and keeping the brush damp helps minimize and brush strokes.
The door of the cabinet was painted in Hurricane Grey, I accented the corners with Aubergine and blended the Tea Rose in the middle.
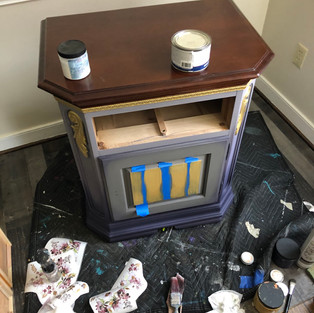
After the door has dried I used painters tape to make stripes onto the door panel. I then used Moonshine Metallics in Gold Digger to paint stripes. This took two coats.
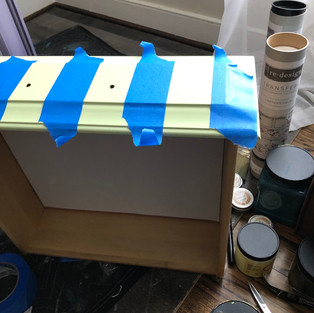
The drawer front will be a accent piece. I wanted to have it be in contrast with the purple and grey base. I used Farmhouse Green to cover the drawer front. Two even coats. I then waited until it was dry to tape off some striped areas. I used Moonshine Metallics in Deep Woods to paint the striped area onto the drawer. Smooth even strokes help metallic paint go on smoothly and without lines.
I had a original plan to use Espresso Gel Stain for the top. When I looked closer the top wood color blended well with the new paint and was in great condition, I cleaned it well and left it as it's original color.
Moonshine Metallics in Gold Digger is my go to gold to accent any piece! I wanted to paint the trim and highlight the scroll work. I used a small craft brush to paint on two even coats of Gold Digger.
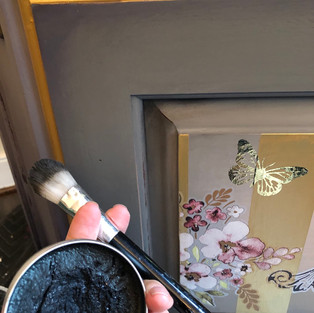
When the entire piece has dried I removed the tape and planned out my transfer placement. Since the Lavender Fields transfer comes in sheets I cut out small bunches of flowers. This way when I plan the flower placement it's easier to burnish down and control. Transfers are a great way to add color and detail. They arrive in a tube and in separate sheets. They have a small wood scraping tool included. You remove the backing and place down the image. You then use that wood burnishing tool to push down and adhere the transfer to whatever item you are putting it on.

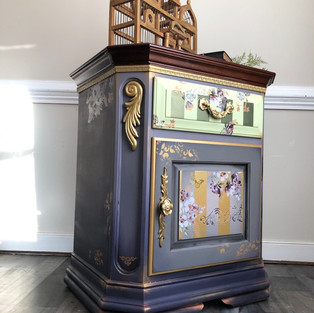
I applied the transfer to the front door, drawer and top sides of the cabinet.
When I have finished applying the transfer I burnish it down again to confirm that it's adhered on all edges. I use a soft sanding pad.
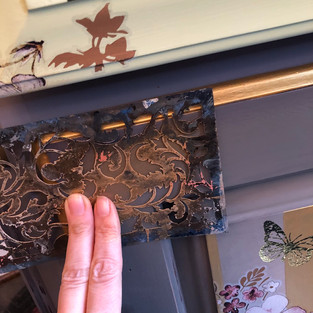
I then used gilding wax in Warm Gold to accent the corners. I applied the wax with a soft brush and feather it outwards to give a glow. Anastasia wax in red was used to cover the corners and blend with the gold. I also used Best Dang Wax in Black to darken the corners. Best Dang Wax in Clear was Applied to the base to seal. I used a small stencil from Michaels to add some gold gilding wax in a pattern to the door front.
I took the original hardware and spray painted it gold. I installed it back onto the piece.

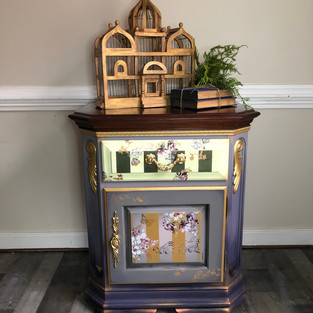
I love the new look of the cabinet, the glowing gilding wax and the transfer make this a original one of a kind.
Thanks for joining me on this makeover journey! If you would like to shop your own Dixie Belle Paint products, click here!
To watch a short video tutorial of this process click here!
Make sure to follow me on all social media @thetopdrawerRVA
